Tinker Manual:
Equipment Guides

Equipment Guide Contents
Introduction
For the Makerspace location of your Tinker Academy, having guides for the equipment available will help to facilitate tech training on the equipment and support for techs and participants to troubleshoot if issues arise.
Below is a link to the Sonoma State University Library Website which contains a summary (with pictures) of the equipment available in the SSU Makerspace: https://library.sonoma.edu/makerspace/equipment.
What’s in the Makerspace?
Below is a small description for each device, found in the Makerspace.
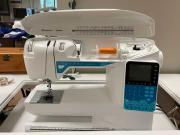
Sewing Machine (Opal and Viking models)
Husqvarna Viking Opal 650
- Full Device Title: Husqvarna Opal 650
- Image of the machine (Upload photo to Google Drive Folder)
- Description: Sewing machine with a large sewing surface. LED display that will show what settings you need for any stitch, including 160 stitch types.
- Category: Sewing
- What can this machine do and make? Can sew clothing, bags, pillows using most fabric types.
- Where can you find it? Center of the Makerspace and behind the heat press area.
- Safety Precautions: Keep your hands away from the needle as it can puncture or cut you without keeping your distance.
- Difficulty level (1-5 stars?) *** (3 stars) The device can be intimidating for those who have never sewn before, but easy to learn once you get the hang of it.
- Tips and Tricks: Always make sure your bobbin and thread are properly set up
- Link to the relevant instruction manual: https://www.husqvarnaviking.com/SiteFiles/ClientSite/ce/ce73897b-e952-4e14-829c-4acf101d59e2.pdf
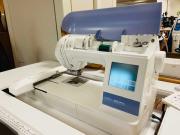
Embroidery Machine
- Full Device Title: Brother PE-770
- Image of the machine (Upload photo to Google Drive Folder)
- Description: A specialty embroidery machine, used to automatically embroider designs with a click of a button.
- Category Sewing – embroidery
- What can this machine do and make? Specific pre-programmed designs that can be automatically embroidered.
- Where can you find it? Center of the Makerspace, next to the other sewing machines.
- Safety Precautions: You can stab or cut your fingers if you are not careful. Machine moves on its own.
- Difficulty level (1-5 stars)? 4 stars. Programming the device can be tricky, along with setting the device up physically, can be a difficult process and subject to fail. Make sure arm is tightly fasten and thread is properly set up.
- Tips and Tricks (if possible): Make sure your thread, bobbin, and embroidery frame is well situated: tension is a must. Look over the manual to verify you have everything set up correctly.
- Link to the relevant instruction manual: BrotherPE770Manual.pdf
3D Printers
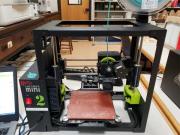
LULZbot Mini
- Full Device Title: Lulzbot Mini
- Description: The Lulzbot Mini is a super easy user friendly 3D printer that can make smaller prints.
- Category: 3D Printing
- What can this machine do and make?
- Ex. jewelry, plaque, game pieces, stickers, etc) 3D print parts, game pieces, small toys, figurines, crochet hooks, etc. (basically anything that makes sense).
- Where can you find it?
- You can find them to the left of the sign-in table as you are walking in.
- Safety Precautions: it gets hot, the extruder and the bed.
- Difficulty level (1-5 stars?) ** for safety and also learning curve, but super easy to learn
- Tips and Tricks:
- Don’t scrape the bed too much, do not touch when hot, bigger prints will not be as detailed as they would be in Ultimakers
- Instruction manuals: LulzBot Mini | LulzBot
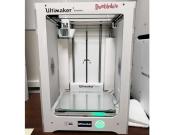
Ultimaker S3 Extended
- Description: A 3D printer used to print larger prints than the Lulzbot Mini 3D printers.
- Category: 3D printing
- What can this machine do and make?
- Jewelry, plaque, game pieces, stickers, etc) 3D print parts, game pieces, small toys, figurines, crochet hooks, etc. (basically anything that makes sense).
- Where can you find it?
- On the wall to the left of the glowforge and right by the Lulzbot minis, in the middle of both the Ultimaker S5 Extended
- Safety Precautions
- Bed and nozzle get hot.
- Possible danger of taking off support structures from prints.
- Difficulty level
- ** (2 stars). Easy, but you will need to learn how to use the Ultimaker Cura software which can be challenging.
- Instruction manual: https://ultimaker.com/3d-printers/ultimaker-s3
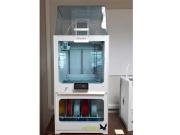
Ultimaker S5 Extended
- Full Device Title: Ultimaker S5 Extended
- Category: 3D Printing
- What can this machine do and make?
- 3D designs using PLA and PVA filament types. Using the Ultimaker Cura applications found on the Makerspace Laptops or main VR computer. The S3 comes with an air filter to remove particles from the air, and a filament, climate control unit to easily switch between other types of filament.
- Where can you find it?
- West wall, to the left of the Makerspace main entrance.
- Safety Precautions
- Do not touch filament, nozzle, or insert hand in printing area. Interacting with these items could result to injury or burns.
- Difficulty level (1-5 stars?)2. Ultimaker Cura must be used in order to print from the device. Intimidating in size, but user friendly in use.
- Tips and Tricks:
- Try switching the infill to a lower number to reduce the time needed to print out an item. Also try to lay your item down instead of printing vertically.
- The Ultimaker S5 is here
Cut and Carve Devices
Laser Cutter
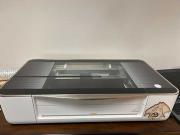
- Full Device Title: Glowforge
- Description: The Glowforge Pro is a desktop laser engraver and cutter. It’s compatible with a wide range of materials including leather, acrylic, wood, glass, fabric, cardboard and engrave of some metals such as anodized aluminum and titanium.
- Category: Laser cutter
- What can this machine do and make?
- Jewelry, custom wood frame, ornaments, leather tote, pencil box, cards, namecards, chess set, stencils, gears, etc.
- Where can you find it
- Behind the soldering station
- Safety Precautions:
- Improperly operating the Glowforge unit can cause fire, eye or skin injury from laser exposure, or exposure to chemicals that may be health hazards. These can result in serious injury or even death. (got this from manual)
- Always have a tech double check our work/settings
- Do NOT leave Glowforge running unattended
- Difficulty level: 3.5
- Hazard level: 5
Carvey
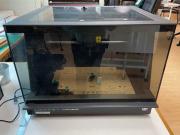
- Full Device Title: Carvey by Inventables
- Description: The Carvey uses bits to precisely cut and engrave material up to 0.9″ thick. The process begins with a solid piece of material and a design—created by you in Easel, a free, cloud-based app. Software translates your visual design into code that tells the machine where and how to carve the material to make the final product.You begin by creating your design in Easel, then carve it with staff assistance for set up and double check measurements of material.
- Category: CNC milling machine
- What can this machine do and make?
- Coasters, jewelry, signs, plaque, frames, puzzles, toys, organizers, etc
- Where can you find it?
- Very bad of the maker space next to the vinyl cutter
- Safety Precautions:
- Do not run the Carvey while the shield is open. Please makes ure the bit is inserted properly and your material is clamped down
- Difficulty level: 3.5
- Hazard level: 2
- Tips and Tricks:
- Make sure you have the right machine selected.
- Always double check sizing of material
- Make sure clamps are not in positioning of design or else clamps will get drilled.
- Instruction manual: http://carvey-instructions.inventables.com/
Bantam Tools PCB Milling Cutter (circuit board cutter)
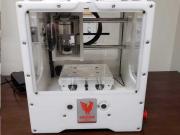
- Full Device Title: Bantam Tools PNB Milling Cutter
- Description: A cut and carve device that specializes in metal and plastic cutting
- Category: CNC device (cut and carve)
- What can this machine do and make?
- Small items such as jewelry, game peices, engravings on metals, plastics and able to creat circuit boards.
- Where can you find it?
- West wall, next to the Laser Cutter and North Supply wall.
- Safety Precautions: Must have knowledge of Bantam Tools Software, understanding or placing material in the cutting area and verifying which bit works best
- Difficulty level (1-5 stars?): 5 stars.
- Set up can be difficult, application use is also tough to understand. Recommend having someone with experience with PCB mills so you can properly use this device.
- Hazard Level: ** (2 stars) due to the possibility of not placing your item in the correct location could damage the device or harm user.
- Instruction manuals:
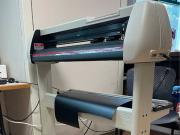
Vinyl Cutter
- Full Device Title US Cutter 4000
- Description: (What is it?) Machine with a blade that cuts both heat press vinyl and regular sticker vinyl
- Category (3D printing, sewing etc) Sticker making, shirt making
- What can this machine do and make?
- Ex. jewelry, plaque, game pieces, stickers, etc) You can make stickers, bumper stickers, stickers for waterbottles or notebooks anything like that, also heat press vinyl for shirt designs.
- Where can you find it?
- At the back of the Makerspace right under the clock
- Safety Precautions: Blade on the actual cutter
- Another image field for student/faculty creations (webpage only)
- Their name (just first name?)
- If there is more than 1 image it can be a slideshow and more can be added later
- Difficulty level (1-5 stars?) 3 stars. Learning the VinylMaster software might be a little difficult, but easy once you understand how to vectorize. Tips and Tricks (if possible)
- https://www.bing.com/videos/search?q=vinyl+master+how+to+use+vinyl+cutter&qpvt=vinyl+master+how+to+use+vinyl+cutter&FORM=VDRE
VR and 3D Scanning
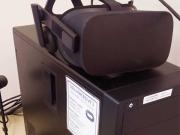
Oculus
- Full Device Steam Oculus Rift S VR
- Description: The Oculus Rift is a VR headset that lets you experience virtual reality, and allows you to interact with most if not all objects in the virtual world.
- Category VR
- What can this machine do and make?
- The oculus rift allows you to play virtual reality games that are made by other people as long as you have the license to play it. Besides playing games, you can practice and learn about skills such as the anatomy of a person or animal.
- Where can you find it?
- In the VRoom
- Safety Precautions:
- If someone is using the VR while sitting down do not get within arm length. If they are standing up while using the VR do not get within two arm length.
- Difficulty Level (1-5 stars)?: 2 if you’re new to VR, 1 if you’ve had experience.
- Tips and Tricks:
- On the Oculus, it has some AR built in, but only to set it up.
- Instruction manual: https://support.oculus.com/articles/getting-started/getting-started-with-rift-s/index-rift-s-getting-started/
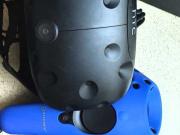
HTC Vive
- Full Device Title: Steam VR HTC VIVE
- Description: The Steam VR HTC VIVE is a VR headset that lets you experience virtual reality, and allows you to interact with most if not all objects in the virtual world.
- Category VR Headset
- What can this machine do and make?
- The HTC VIVE allows you to play virtual reality games that are made by other people as long as you have the license to play it. Besides playing games, you can practice and learn about skills such as the anatomy of a person or animal.
- Where can you find it? Behind the front desk or in the VRoom.
- Safety Precautions: If someone is using the VR while sitting down do not get within arm length. If they are standing up while using the VR do not get within two arm length.
- Difficulty level (1-5 stars)? 2 if you’re new to VR, 1 if you’ve had experience.
- Tips and Tricks (if possible): Always replug in your controls so that the next person can use them without possible loss of power.
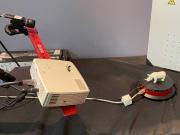
3D Scanner
- Full Device Title 3D Scanner
- Description: Allows you to scan objects to be made into 3D objects online, or as 3D models which you may 3D print
- Category (3D printing, sewing etc): 3D scanning, scanning
- What can this machine do and make?
- Ex. jewelry, plaque, game pieces, stickers, etc): 3D models
- Where can you find it?
- Right corner of the makerspace in the brainstorm zone, near the couch!
- Safety Precautions: light may shine in your eyes but other than that no other danger
- Difficulty level (1-5 stars?) 5 stars.
- Very difficult, you will need to spend 15 to 30 minutes preparing your scan. Be ready to keep making adjustments until the perfect scan is done.
- Tips and Tricks: this is a really wonky thing that takes a lot of patience and slight tinkering
Other Devices
Soldering Devices
- Full Device Title Weller WLC 100
- Description: Soldering is used to melt a low melting alloy (tin or aluminum) to connect two (or more) points to each other.
- Category: Soldering Iron
- What can this machine do and make?
- Help connect circuits together on a circuit board.
- Where can you find it?
- North wall of the Makerspace, next to the Glowforge.
- Safety Precautions: Device can burn and emit hazardous fumes. Please wear gloves and use an air filter when using a soldering iron.
- Difficulty level (1-5 stars?) ** (2 stars).
- Easy to learn, but it’s important to be safe. Please make sure a filter is on, damp a sponge, and wear heat resistant gloves (if possible).
- Tips and Tricks
- Make sure to have plenty of space to take it slow.
- Instruction manual: Adafruit Guide to Soldering

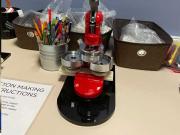
Button Maker
- Full Device Title: Button Maker
- Description: The Button Maker is used to make buttons that are 5.6 cm( 2 1/4in) or 2.5cm(1 in) button pins.
- Category: Button Maker
- What can this machine do and make?
- Button pins, badges, game pieces, etc
- Where can you find it?
- In front of the heat press up against the wall to the right as soon as you walk in from the gate.
- Safety Precautions: Cautious with fingers getting pinched.
- Difficulty level (1-5 stars?): 1
- Hazard Level: 1.5
- Tips and Tricks:
- When placing metal backing, image then plastic on top on the right side make sure that the metal are not aligned with the holes when pressing. Once pressed and you slide the left metal bottom after placing the backing you make sure the metal rods are aligned to go through the holes.
- If metal backing is already damaged do NOT use it. It will not work
Workbench (includes drill press)
- Full Device Title: Makerspace Workbench
- Description: A workbench that supplies a variety of tools for use throughout the makerspace. Complete with drill press.
- Category: Cut and Carving
- What can you do here?
- Cut, hammer, drill and clamps
- Where can you find it?
- North Wall of the Makerspace, next to the supply wall.
- Safety Precautions: wear gloves and eye protection. Make sure you have the proper technique when using those tools.
- Difficulty level (1-5 stars?) ** (2 stars)
- Most tools are straight forward and don’t require much training. Any of the electric tools (Dremel, heat gun, drill press) may require a few attempts of usage to understand them.
- Hazard level: ***** (5 stars) Mishandling any tools or drill press can be fatal.
- Tips and Tricks:
- Always cut down and clean after yourself after using any tools.

Documentation
Below you’ll find a link to a spreadsheet that documents all SSU Makerspace equipment.
