Tinker Manual:
Program Details

Program Details: Contents
Schedule Notes
The Example Two-Week schedule gives an hour-by-hour schedule of suggested activities and projects. Further details and rationale for the schedule is outlined in the document in the “Running the Academy” folder. Here is a brief outline for each day:
Day One
Setting the stage! The first day is slightly different in format and schedule than the next days, as the first day is an important time for participants to get acquainted with each other, the staff, and the space. This day should include a lot of guided time and bonding time.
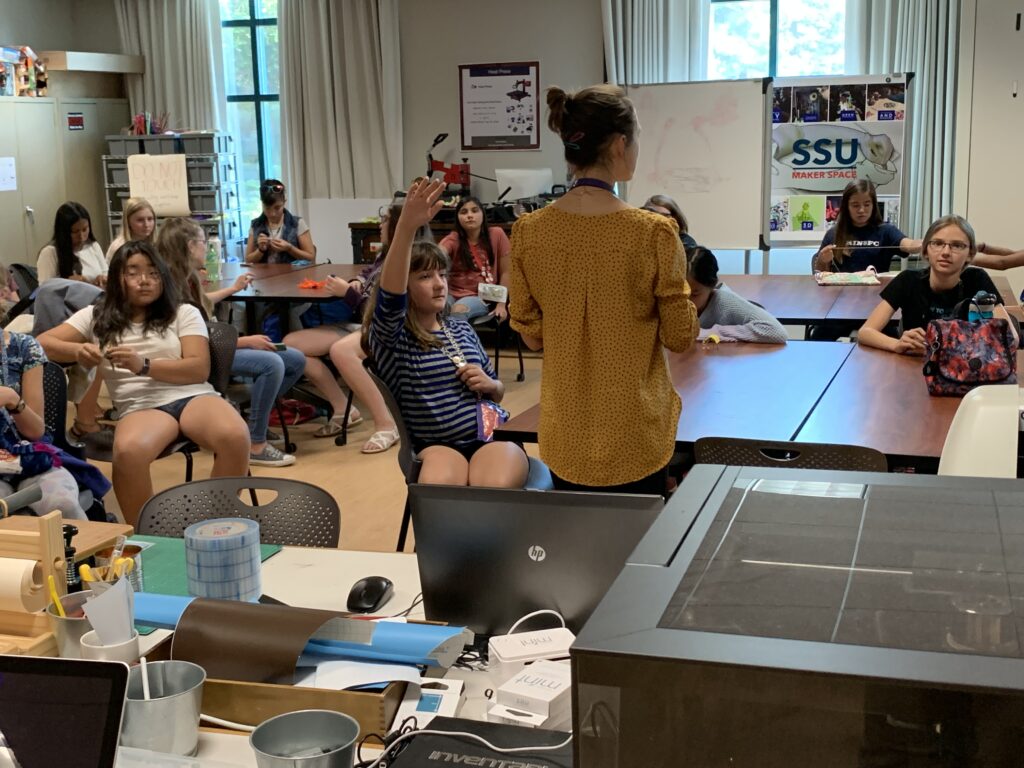
During our first day, we started with an introduction activity so that participants can learn each other’s names. This can be done by having participants introduce each other or some other form of bonding game. Participants should also be told some general “rules” about the program. This should include rules about what tools/supplies are “on” or “off” limits, what type of etiquette is allowed in the space, and general safety tips about the equipment.
For example rules, click here.
After brief introductions, participants should get right to work making! The first day has been a great opportunity for participants to make a Duct Tape name badge and a journal (see the folder “Project Descriptions” for details on these projects; for a badge template, click here). The journal participants create they will use throughout the program to answer reflection prompts, write down design ideas, and plan out their projects!

Equipment Tutorials
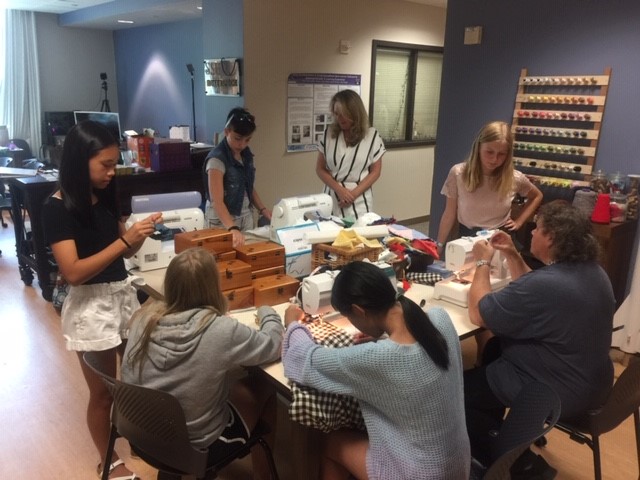
The first week is when we have our “equipment tutorials” these tutorials help students learn the skills for using the Makerspace equipment. For the previous Tinker Academies they have included: Sewing Machines, Laser cutter, and 3D printer. Each tech should take the lead on one of these equipment tutorials and participants should rotate each day so that at the end of the first week each participant will have gone through each equipment tutorial. The Equipment tutorial should include a project that the participants make in order to help give them the skills for using the equipment.
Mentor Activities
A group of 4-6 mentors (in our Academy these were undergrad students) helps lead small groups in activities to help participants get to know each other and reflect and explore their career interests. Having separate mentors and techs provides opportunities for techs to have breaks during the day. It is recommended that Mentors meet with with same group of participants throughout the entire program so that mentors and participants can get to know each other more.
We have scheduled mentor activities for the hour after lunch. This allows participants to transition back into work time and get out any extra lunch energy. This also allows the techs to take a longer lunch break, especially if mentors are not able to arrive until after lunch. For more information: see the Mentor Activities folder within “Project Descriptions.”
Lunch and Snack Tips
Lunch time is set for an hour long. Participants usually only take 15-20 minutes to each, but the flexible time during lunch allows participants to come up with other games and activities to play on their own during that time.
We have tried both providing lunch and having students bring their own lunch. We have found that having students bring their own lunch works best (this ensures everyone has something they can and like to eat and prevents singling out anyone for dietary needs). We initially thought providing lunch would create more community, but it ended up causing more conflicts. We continued to provide snacks for the participants and this we thought was beneficial.
Snacks were provided in the morning and optional in the afternoon (meaning not every day was there an additional afternoon snack). Students were always very eager for a morning snack, it acted as a “pick-me-up” and get everyone more energy through the morning session. It did become important to provide snacks to participants, as not everyone would bring their own snack if encouraged and if someone forgot to eat breakfast it helped hold them over to focus until lunch.
Guest Speakers and Outings
The Tinker Academy is enriched by outside guest speakers or visits to other departments or programs. These breaks from the usual making activities gives students a change of focus (helping to keep them engaged) and also allows them to think about their future career and academic endeavors. It is best to invite guest speakers into the academy space (the makerspace), venture out to other labs and programs (if distance or transportation allows), or offer virtual meetings online. Guest speakers that we have used in passed programs have come from mostly other faculty and staff at the school in which the maker space is located. Such visitors have included a computer science professor specializing in research on Cosplay, education outreach specialist from MicroBit, author and designers of wearable circuits, and other professionals in the community who work in STEAM areas.
In addition, having the Academy located in a makerspace on a college campus in the past has provided us the opportunity to visit science labs on campus. We did this by using the physics lab to practice soldering, getting a tour of the specimens in the biology department, and testing water samples in the ecology department. Again, these outing provided breaks from the projects and routines in the makerspace and allowed students and mentors to bond by providing them with new opportunities to explore together.

Tinker Time
Tinker Time is unstructured time for participants to explore their own interests and create/design their own projects. Tinker Time developed out of requests from participants when they asked us for more “free time” in the makerspace. The first time running the TA we had every minute structured with a lesson plan, project, and outcome. However, having such a structured schedule meant there was little time for natural creative flow. By providing at least an hour a day of “Tinker Time” or “open-use” in the Makerspace, participants get to choose which skills they want to practice/develop and get to practice using their creativity to create projects. Tinker Time was mostly spent by participants finishing their equipment tutorial projects or working on their showcase project.
It was sometimes the case that a participant needed some help generating ideas for what to do during Tinker Time. This didn’t happen often, but in order to prevent students from sitting idle or needing help staying on task, we provided a binder filled with project ideas for students. This binder contained short project and ideas that could get students started making. We have compiled some of these projects in the “Project Description” folder under “Binder Projects.”
Showcase
The Tinker Academy concludes in a 1.5-2 hour project showcase in which students’ parents and the community are invited into the makerspace in order to see the students’ work in the program. Participants are told throughout the program about the showcase with the idea that they will create a “showcase project” during the program that will include multiple skills that they learned during the program. At the showcase, attendees wander around to view the projects and chat with the participants. This gives the participants an opportunity to practice explaining their project and the skills they learned.
The prompt to students for their showcase project is dependent on the interest or goals of the TA leadership. In some TAs, we have required participants to create a project that uses at least 3 different skills or techniques they learned about in the TA. Other Academies have more direct prompts, such as to create a project or prototype for a tool or invention that would help make the world a better place or help prevent global warming (for example).
In order to help participants stay on track with finishing a showcase project by the event, it is important that students have their plan for the project ready by the end of the first week of the program. During the last part of the last day of the first week, it is advised to have students write down their ideas with any additional supplies they would need for their project. This way, students are thinking about how to approach and create their projects over the weekend of the academy and the academy staff can gather more supplies for the projects if necessary.
The showcase should be an event of celebration and fun as participants show off their projects and inventions! In order to get more people excited and involved it is great to invite leadership involved in the makerspace (but not necessarily involved in the academy) and invite any sponsors of the program. Providing light snacks is a great idea to help set a relaxed atmosphere with plenty of networking and chatting.
Preparing for the Academy Checklist
The Tinker Academy takes months of planning and preparing! But do not worry! The journey is super fun! Here is a checklist of things to consider for getting started and preparing for the academy.
- Plan dates for the program that work in school schedule, instructor schedule, and Makerspace schedule.
- Reserve space in the makerspace
- Market Academy to students
- Applications sent out
- Select applicants
- Communicate with accepted applicants and gather their confirmations.
- Create Schedule to include daily challenges and activities. For an example schedule, click here.
- Gather staff:
- Hire makerspace techs
- Hire mentors (in the past this has been a volunteer position)
- Network with local makers and possible speakers.
- Create a supply list. For a sample supply list, click here.
- Purchase supplies (look for bargains or donations)
- Gather participants further information (such as emergency contact, who can pick up participants, allergies, etc.).
- Organize participant information
- Train staff:
- Ensure techs are familiar with the equipment and can help students troubleshoot
- Prepare techs on mission and goals of the program.
- Communicate schedule and duties to techs.
- Assign techs to equipment for equipment tutorials or workshops.
- Create a schedule for techs so that they can be taking breaks.
- Prepare supplies and ensure equipment in makerspace is functioning
- Create daily sign-in and exit sheets to keep track of participants
- Email parents with information about pick up and reminders of timing of the program. For sample parent emails, click here.
- Get excited! And have fun!
Project Description Folder Explanation
This folder contains three subfolders listed below. For another format, and more project ideas, see the Wakelet created for Tinker Summer 2020 which is a compilation of all projects during the Virtual Tinker program in Summer 2020: https://wakelet.com/@NatalieH.
- Activities/Lessons: These files include lessons to go along with equipment tutorials or other skill building. They are best used during the first day or during afternoons to build skills.
- Challenge Projects: Usually 2-3 hour long challenges in which participants must work together to create and design. These projects are best during the second week of the program after the equipment tutorials have taken place during the first week.
- Binder Projects: During “Tinker Time” sometimes participants need ideas for what projects or crafts to create. This folder contains lots of project ideas for participants. They are called “Binder Projects” as the tutorials are best printed out and put into an easily accessible binder in the makerspace that participants can flip through to get ideas for projects to create.
